
 adobe adobe adobe adobe adobe." width="748" height="582" />
Master the Line Tool in Photoshop with our guide on all three methods to create straight lines using Shape Mode, Path Mode and Pixel Mode.
Shotkit may earn a commission on affiliate links. Learn more.
Dive into the digital design world with our quick guide on using the Line Tool in Photoshop.
The Line Tool is a simple yet powerful feature that can add precision and flair to your creative projects.
Whether you’re drawing attention with arrows, crafting custom shapes, or outlining your next masterpiece, mastering the Photoshop Line Tool is an essential step for any aspiring designer.
You already know how to make dotted and dashed lines and how to draw straight lines in Photoshop, so now it’s time to learn some other line-drawing techniques.
Let’s get those lines perfectly drawn!
HIGHLY RECOMMENDED

Adobe Photoshop
Download a free copy of Adobe Photoshop to follow along with this simple tutorial.
Table of Contents
Creating a line in Photoshop can be way easier than expected, and all thanks to the Line Tool.
Photoshop’s Line Tool comes equipped with three different modes: Shape, Path or Pixel.
When using a software program as powerful and versatile as Photoshop, there will always be a few ways to achieve your design goals.
And it is no different when it comes to creating a two-point line.
You can use one of many tools to create a line in Photoshop. Take your pick from the pen tool, the brush tool or even the marquee tool.
So why use the Line Tool? Why would one need a specialised Line Tool for such a simple design?
The Line Tool was designed specifically for the purpose of creating a line.
Thus, the Line Tool gives you the versatility you need when it comes to achieving precision line design goals.
For example, unlike Photoshop’s other tools, the Line Tool allows you to specify color of the line.
You can choose to fill the line with a pattern or gradient or leave it with no fill.
The Line Tool allows you to add a stroke to the line and specify its exact size. Plus, so much more.
Intrigued? Who knew lines could be so interesting?
So, let’s dive in and find out everything there is to know about Photohsop’s Line Tool.
Designers use the Line Tool when they want to draw a simple two-point line.
The Line Tool allows you to create a line as a vector shape, path, or as pixels.
Select the Line Tool from the toolbar to the left of the canvas workspace.
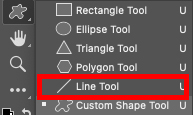
Click on the Shape Tool to find the Line tool in the dropdown menu.
Alternatively, hit U for the keyboard shortcut.
When you select the Line Tool, the Line Tool’s options bar will open above your canvas workspace.
This is where the design fun begins and where you specify the properties of the line you wish to create
Let’s take a good look at the Line tool’s options tab.
The first option you will find is the line’s mode. You will have three choices in a drop-down tab: Shape, Path or Pixels.

If you need a non-destructive scaleable line, then choose the shape option.
When you select the Shape option, the line will be created as a non-destructable vector.
This means you will be able to scale the Line up or down without affecting its quality.
Vectors are created using mathematical equations made up of lines and curves. They are not made using pixels.
A vector will never lose resolution, but a pixel shape will.
A vector line can be converted to a pixel line at any stage if needed.
When the Shape mode is selected, the options tab will change to offer the Shape Line Tool options.
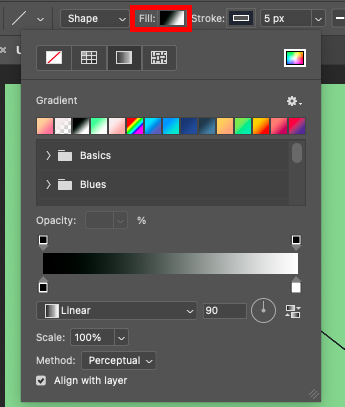
The first property option will be the Fill box.
Click on the Fill box, and four fill options will be presented in the dropdown dialogue window.
The first option is represented by a white rectangle with a red line crossed through.
Activate this if you want to create a line with no fill (transparent).
The second option is a gridded rectangle icon.
Select this when you want to fill your line with a block of color.
The third icon is a gradient rectangle. Select this if you want to create a line filled with a gradient color.
As you can see in the image below, you will be presented with a selection of colored gradients to choose from.
You will also be able to adapt the gradient’s opacity, scale, and angle.
The fourth and last icon is a patterned rectangle. Activate this when you want to fill the line with a pattern.
Select this option, and you can select to fill the line with any of the patterns in Photoshop’s pattern library.
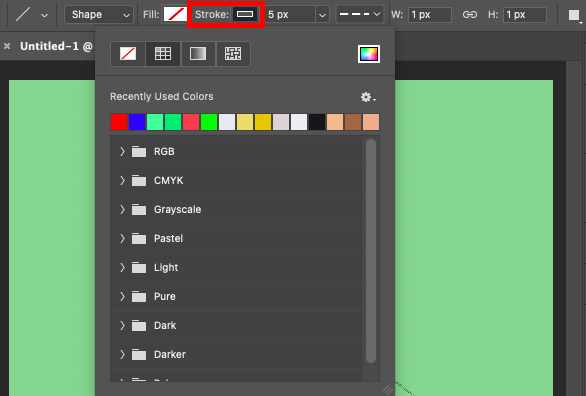
Beside the Fill box, in the options bar, is the Stroke box.
Select this box if you want to add a stroke to the line. Once selected, a drop-down dialogue box will pop open.
Here, you will have the same options as for the Line’s Fill options.
You can select for the stroke to be made using a block of color, a gradient, or a pattern.
Or you can select to have no stroke, by clicking the white icon with a diagonal red line.
By default, the line’s Stoke will be positioned in the middle or on the outside of the line.
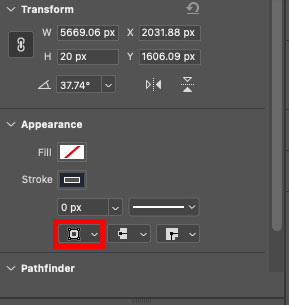
To change the default setting, open the line tool’s properties panel.
To do this, click on the two arrow icon in the top right of your canvas workspace.
Once clicked, the Properties dialogue panel will pop open.
 adobe adobe adobe adobe adobe." width="289" height="379" />
At the bottom of the Properties panel, you will find three options.
Click on the first icon and set your preference for the stroke’s position—outside, inside or middle.
 adobe adobe adobe adobe adobe." width="289" height="305" />
The next option is the option to set the pixel size of the stroke. Change the stroke size by adding a value in the box.
Or click the arrow, and a size slider will pop open. You can slide the slider bar to the left or right to alter the size of the stroke.
![]() adobe adobe adobe adobe adobe." width="689" height="64" />
adobe adobe adobe adobe adobe." width="689" height="64" />
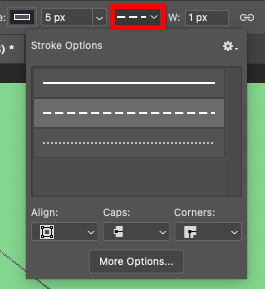
The next option allows you to select the Line’s style: Dashed, dotted, or straight.
Click on the arrow icon to open the style’s dropdown menu.
Select if you want the line to be dashed, dotted, or whole. Your choice will not affect the line’s fill or stroke.
Select the dropdown menu beneath Caps and Corners to chose round or rectangle ends for the line.
The next option in the options bar allows you to set the exact dimensions of the line.
This is useful when you need the line to fit a specific space.
Click the padlock icon when you want to lock the line’s dimensions.
Unactivate the padlock when you want to alter the line’s width separately from the height.
 adobe adobe adobe adobe adobe." width="624" height="58" />
Each line that is created using the Line Tool’s Shape mode will automatically generate a new layer in the Layer Panel.
The white square icon gives you control over how the line layers you create interact with each other.
Photoshop gives you the option to Combine Shapes, Subtract Front Shape, Intersect Shape Areas, and Exclude Overlapping Shapes.
The last option in the dropdown menu is Merge Shape Components.

To align or distribute the line layer, click on the icon made up of two rectangles.
Click on your preference of alignment in the drop-down dialogue window that opens.
 adobe adobe adobe adobe adobe." width="300" height="295" />
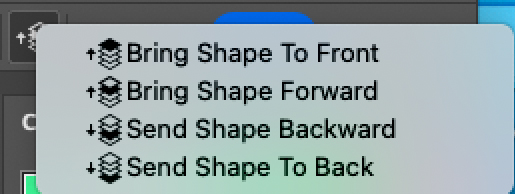
To change the location of the line layer in the Layer Panel, click on the icon of an arrow beside four stacked squares.
Select an option to change the position of the line’s layer in the Layer Panel.
The second mode option is Path. Select this option when you want to create the line as a Path.
Designers use a path when they wish to create a line-shaped selection.
A Path is non-destructive, like a Vector shape. Therefore, it can be scaled without losing quality.
When the path is created, a path selection will be created.
Click Mask if you wish to create a layer mask from your line selection.

Choose the third mode option, pixel mode, when designing rasterized content such as a raster image.
![]()
When you create a line using the pixel option, you can choose your preference of color by clicking in the color panel.
To select the line’s mode, click on the arrow beside the Mode box.
From the dropdown menu, you can select your mode preference. Such as Overlay, Dodge, Darken, Hue, etc…
Set a value for the opacity of the line in the box beside Opacity.
Click the box beside Anti-Alias if you want your line to have smooth edges.
Enter a value in the box beside Weight to set the width of the line.
NOTE: If you opt to create a line using Path or Pixel Mode, creating a new layer for the line is a good idea.
This will allow you to edit the line separately from the background layer.
If you don’t create a new layer, the line will merge with the background layer.
Therefore, editing the line independently from the background layer will not be possible.
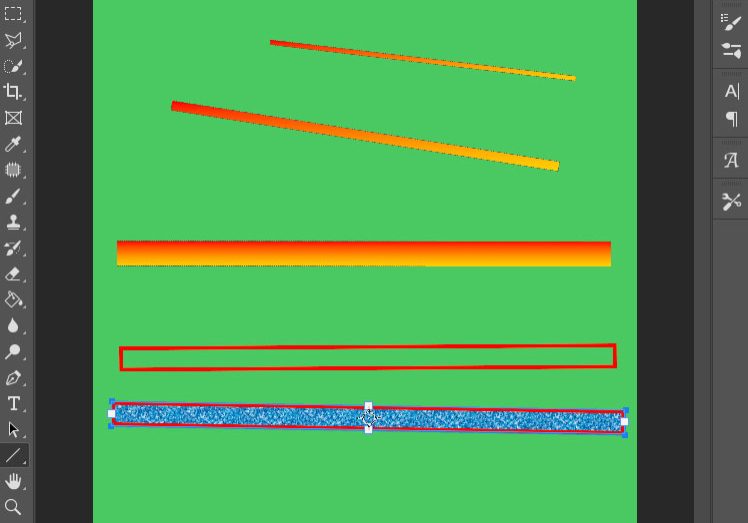
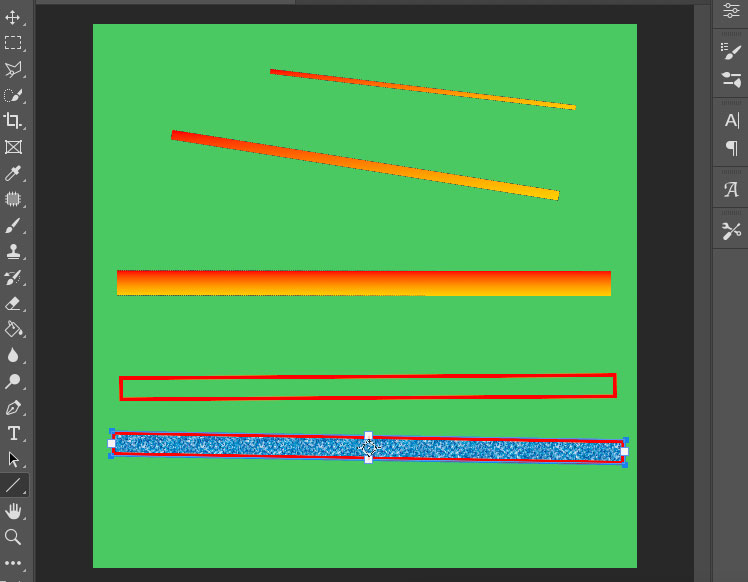
Now that you have set the properties of the line, it is time to go ahead and create it.
Click on the canvas workspace and drag your cursor across the canvas.
When you are happy with the line’s size, release the cursor.
Your line will be created.
 adobe adobe adobe adobe adobe." width="748" height="582" />
If your line isn’t in the correct position, don’t stress there is an easy relocation solution —the Move Tool.
Select the Move Tool from the toolbar, or hit V for the keyboard shortcut.
Click on your line and drag it to the correct position.
When creating a line using the Line Tool, you can adjust the line’s properties using the Line Tool’s Properties Panel.
Open the Properties panel to specify the line’s angle. You can do this by entering a value in the box beside Angle.
In the Appearance box, you can curve the line’s two endpoints. Click on the middle icon at the bottom of the box.
A drop-down menu will open. Here, you can select square or curved endpoints.
 adobe adobe adobe adobe adobe." width="289" height="379" />
And did you know the Line Tool has a well-hidden secret: It can make arrows.
To add arrowheads to either or both ends of the line, click on the Cog icon in the Options bar.
In the dialogue box that opens, you can add your preference for arrowhead under the section titled Arrowheads.
If you liked this Photoshop tutorial, you might enjoy – How to Draw a Circle in Photoshop (Outline or Fill).
How do I reset the line tool in Photoshop?
To reset the Line Tool in Photoshop, click on the Line Tool’s icon in the top left-hand corner of the workspace.
Click on the downward arrow beside the Line Tool’s icon.
A dialogue box will open. Click on the cog icon. From the drop-down menu that opens, select Reset Tool.
Why is my line tool in Photoshop an arrow?
The Line Tool gives you the option to create arrows.
If you don’t want to create an arrow, reset the Line tool; this will set it back to create a basic line.
Alternatively, click on the cog in the tool’s options tab.
In the Paths Options dialogue box that opens, unclick the boxes beside Start and End under Arrowheads.
Why won’t my line show up on Photoshop?
There are a few reasons why your line won’t appear in Photoshop.
One reason is that the color of the line is the same color as the background.
Another reason is that it is below the top visible layer.
Or it could be because the line stroke is set to the inside. Set the stroke to the outside of the line.
How do I change the shape of my line tool?
To change the shape of the line using the Line Tool, change the value in the box beside Weight.
This will change the width of the line.
What is the use of the line tool in Photoshop?
The Line Tool is used to create a two-point line in Photoshop.
The Line tool allows for quick design options, such as adding a stroke and altering the line’s dimensions.
What is the shortcut to the line tool?
To access the Line Tool’s keyboard shortcut, hold Shift plus U.
This will open Photoshop’s Shape Tools. Keep clicking the U until you find the Line Tool.